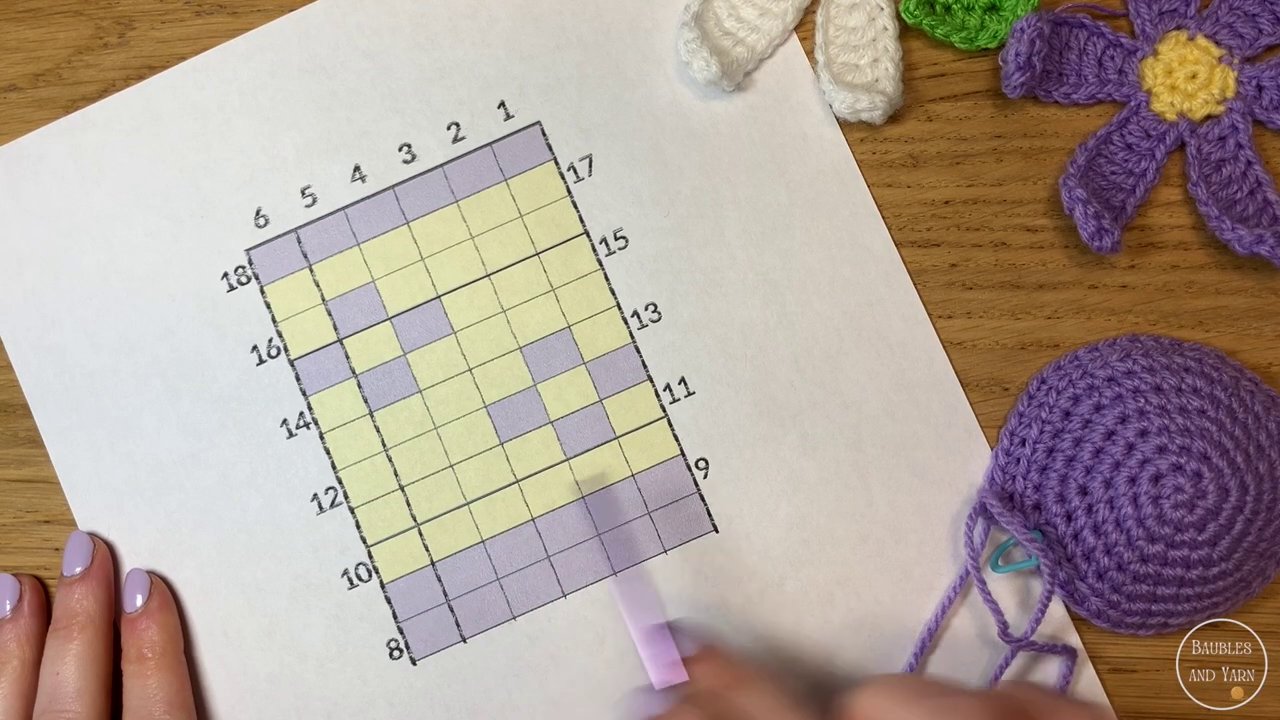
If you’ve ever looked at a crochet chart and felt your eyes glaze over, you’re not alone. Those grids of colored squares can look intimidating at first, but once you understand the logic behind them, they become the easiest way to follow a colorwork pattern. No more squinting at confusing written instructions — just one square, one stitch, and a clear path from start to finish.
Let me show you how it works.
What a Crochet Chart Actually Tells You
Every square on that grid represents one single stitch. That’s it. Whether you’re working tapestry crochet, fair isle, or any other colorwork technique, each colored square corresponds to exactly one stitch in that color.
The chart itself has two sets of numbers. The horizontal numbers running across the top or bottom mark your rows or rounds. The vertical numbers along the side tell you how many stitches are in each row. So when you see a row labeled “10” with six squares, that means round 10 has six stitches of whatever colors are shown.
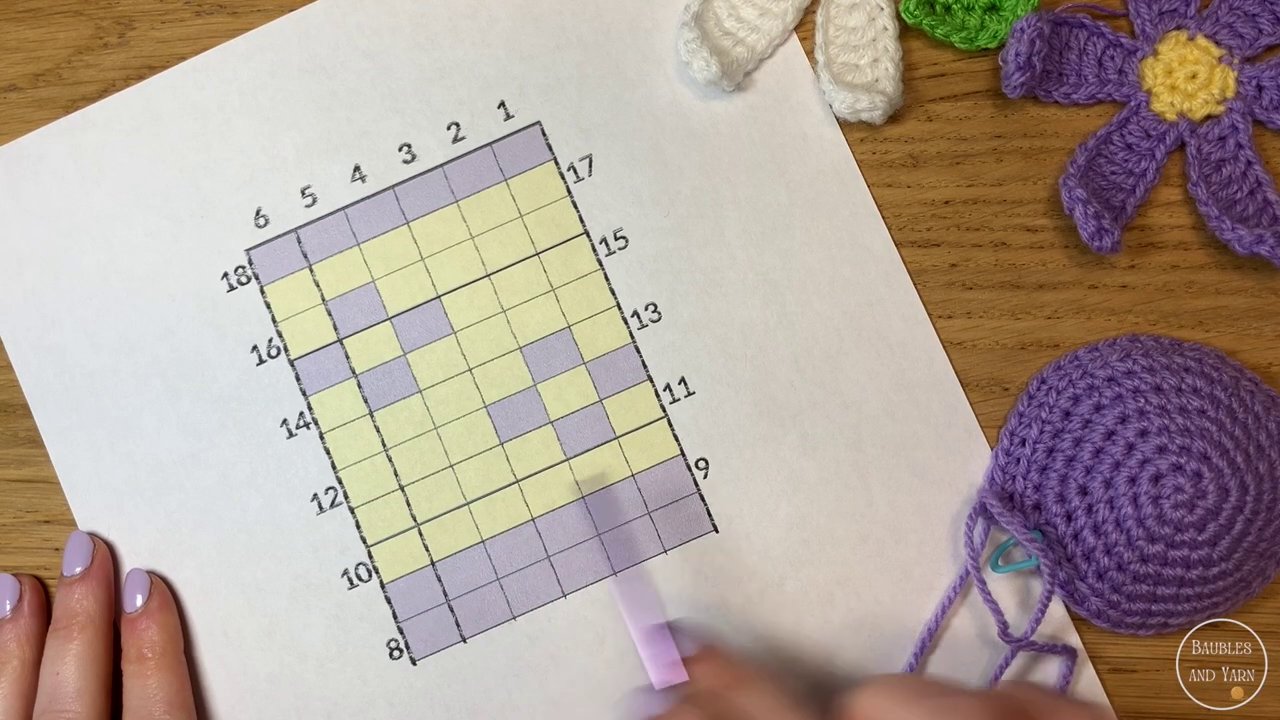
Some patterns give you the full chart for an entire project. Others show just a small repeat — a handful of stitches that you work over and over around the piece. In the example I’m working through, the repeat is six stitches per round. That’s common for things like mug cozies, hats, or any project worked in the round with a repeating pattern.
Right to Left, or Left to Right?
Here’s where things get a little personal. If you’re right-handed like me, you read the chart from right to left for each row or round. Left-handed crocheters typically do the opposite, which creates a mirror image of the piece.
This matters most when your design has directional elements — letters, animals, anything that shouldn’t end up backwards. If you’re left-handed and working from a right-handed chart, you’ll need to flip the image mentally or use a mirror tool. For simple geometric patterns, it usually doesn’t matter much.
Starting Simple: One Color at a Time
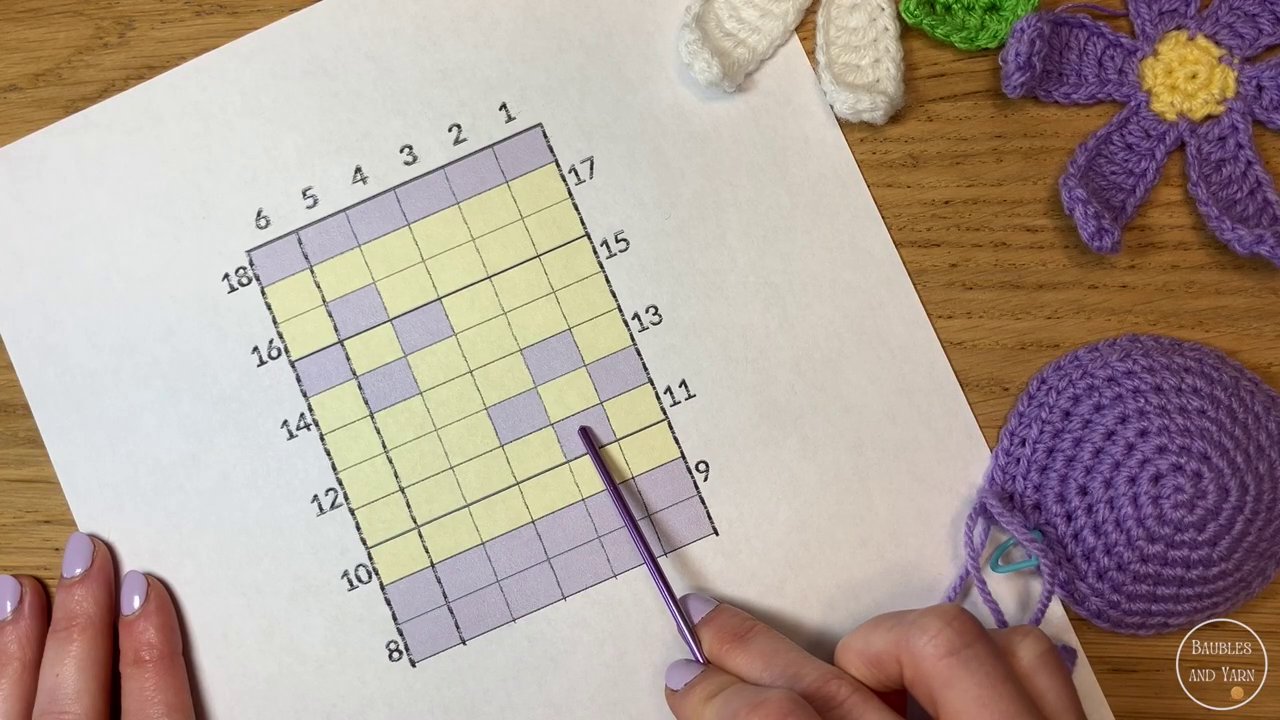
Let’s say you’re on round eight of your project, and the chart shows nothing but purple squares across the entire row. That’s your cue to work one round of single crochet in purple, one stitch in each stitch from the previous round. No color changes, no thinking — just stitch after stitch in the same color.
Same goes for round nine. All purple again. Easy.
But here’s a detail that trips people up: your pattern might specify whether you’re working into the front loop, back loop, or both loops. If it doesn’t say, assume both loops. If it says “BLO only,” you’ll be working into the back loop only for the entire piece. That’s common in tapestry crochet to create a cleaner color change and a more defined fabric.
The Color Change: Where the Magic Happens
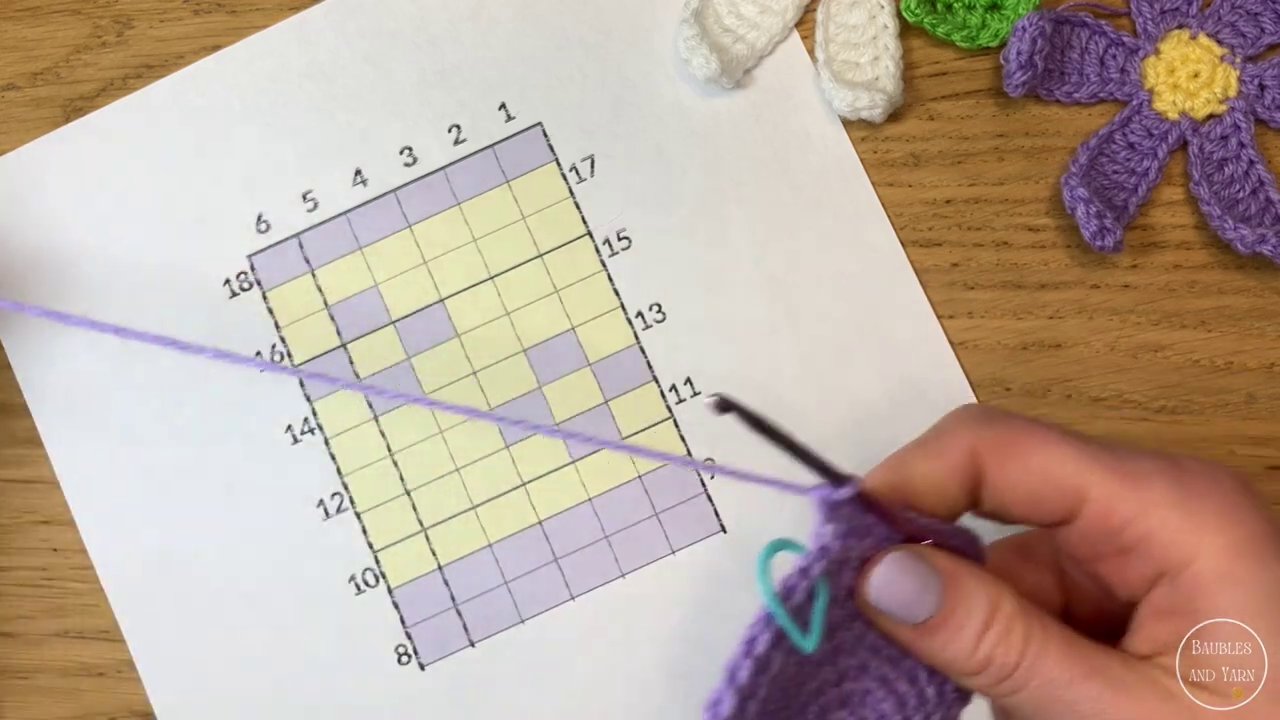
When you reach a round where the chart shows a new color, you need to switch yarns. The trick is to do it at the right moment — specifically, on the last yarn over of the last stitch before the new color starts.
So if you’re finishing a purple stitch and the next square is yellow, complete your purple stitch normally until you have two loops left on your hook. Then grab your yellow yarn, pull it through those two loops, and finish the stitch with yellow. That’s your color change.
I like to crochet over the tail of the new color for a few stitches before the change to secure it. That way I don’t have to weave in as many ends later. It’s optional, but it saves time and keeps things tidy.
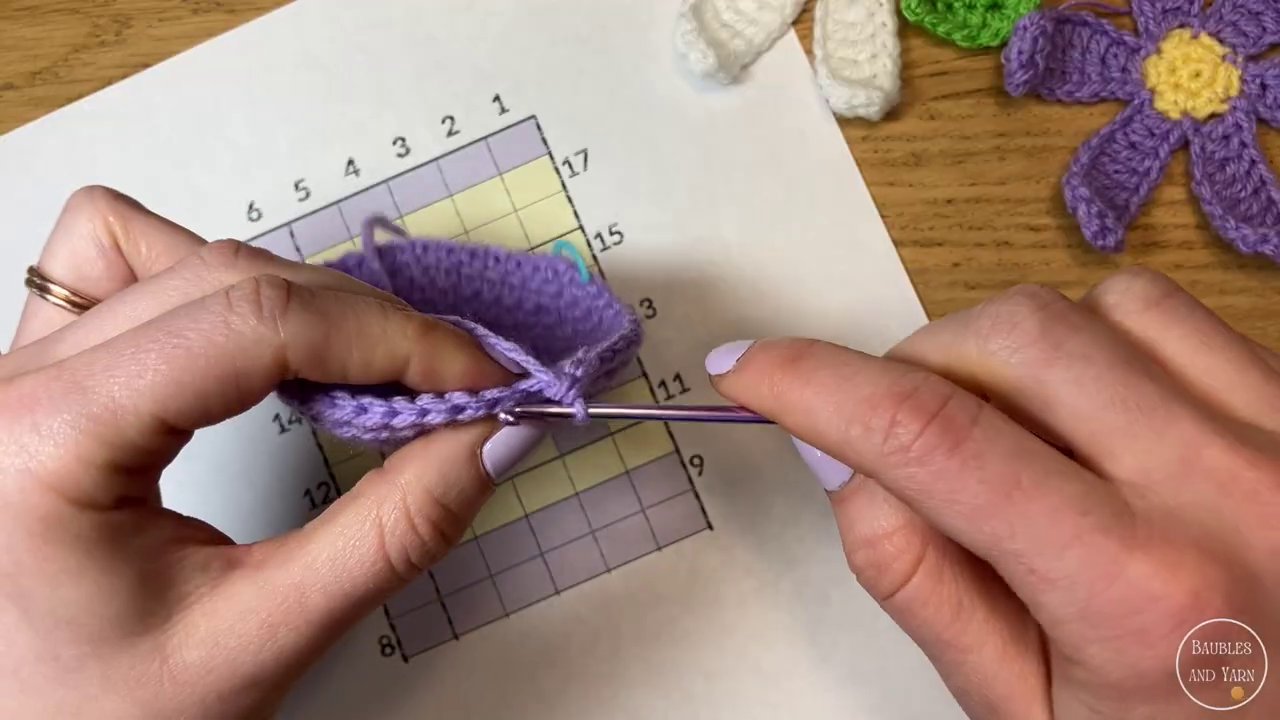
If you need more detail on color changes, I have a separate tutorial that walks through it step by step. The same goes for carrying yarn — I’ll touch on that in a moment.
Reading the Chart as You Go
Once you’re in the middle of a colorwork round, the chart becomes your roadmap. Let’s say round 11 shows: one yellow square, then one purple, then four yellow. You’d work one stitch in yellow, switch to purple for the next stitch, then switch back to yellow for the next four stitches.
Then you repeat that six-stitch block all the way around.
Here’s where you need to stay focused. After your fourth yellow stitch, the pattern starts over with another yellow, then purple, then four more yellow. If you lose your place, look at the chart — it’s all right there.
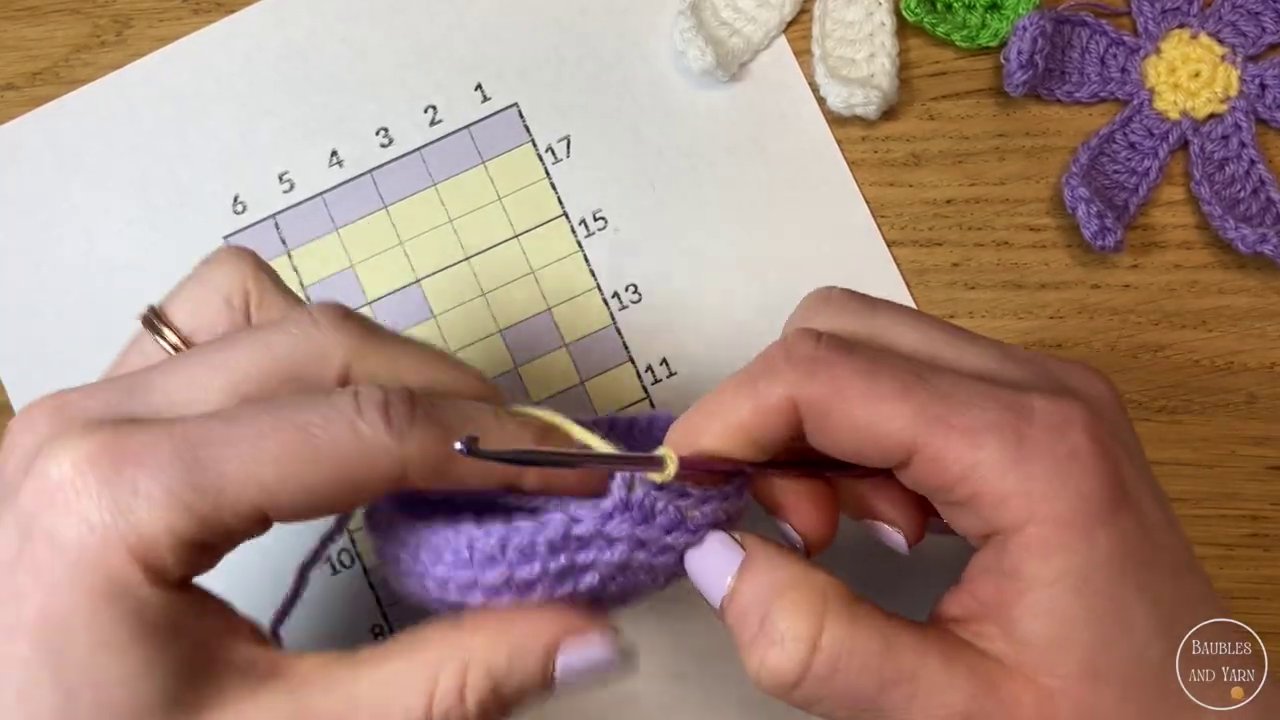
When the next round starts with a different color, you’ll need to do your color change on the very last stitch of the previous round. That’s non-negotiable if you want clean, sharp color transitions. If you finish the round in yellow and the next round starts with purple, you have to switch on that final yellow stitch.
Managing the Yarn You’re Not Using
When you’re working with two or more colors, the yarn you’re not currently using has to go somewhere. You have a few options.
Carrying the yarn means you bring the unused strand along the back of your work, catching it every few stitches so it doesn’t get loose. I prefer this method for most projects because it keeps tension even and doesn’t create long floats that can snag. You simply hold the carried yarn behind your work and crochet over it as you go.
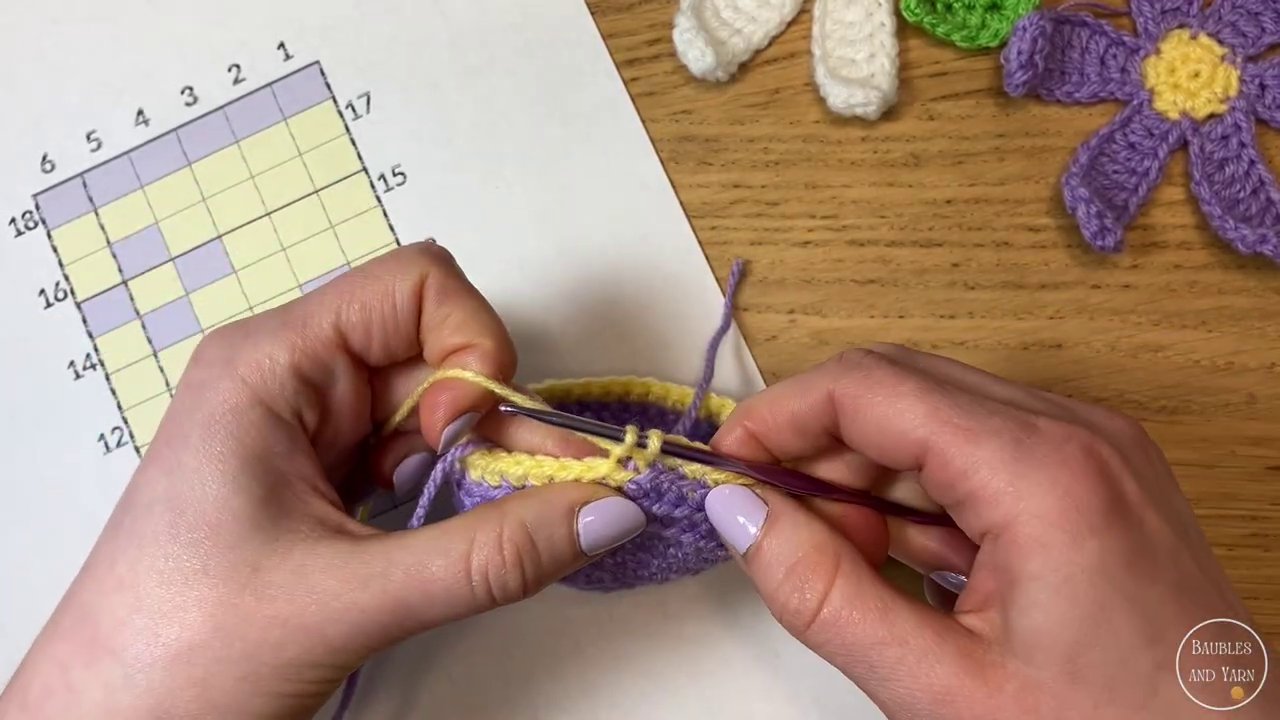
Leaving floats is another option. You just let the unused yarn hang loose across the back of the piece. This works fine for projects that won’t be stuffed or worn, like dishcloths or flat panels. But for amigurumi or anything that gets handled, floats can be a problem — fingers get caught, and the tension can pull.
Crocheting over the yarn is similar to carrying but sometimes the darker color peeps through the stitches, especially if you’re using white with a dark color. If you’re working a light color over a dark carried strand, you might see it shadow through. Test a few stitches and see if it bothers you.
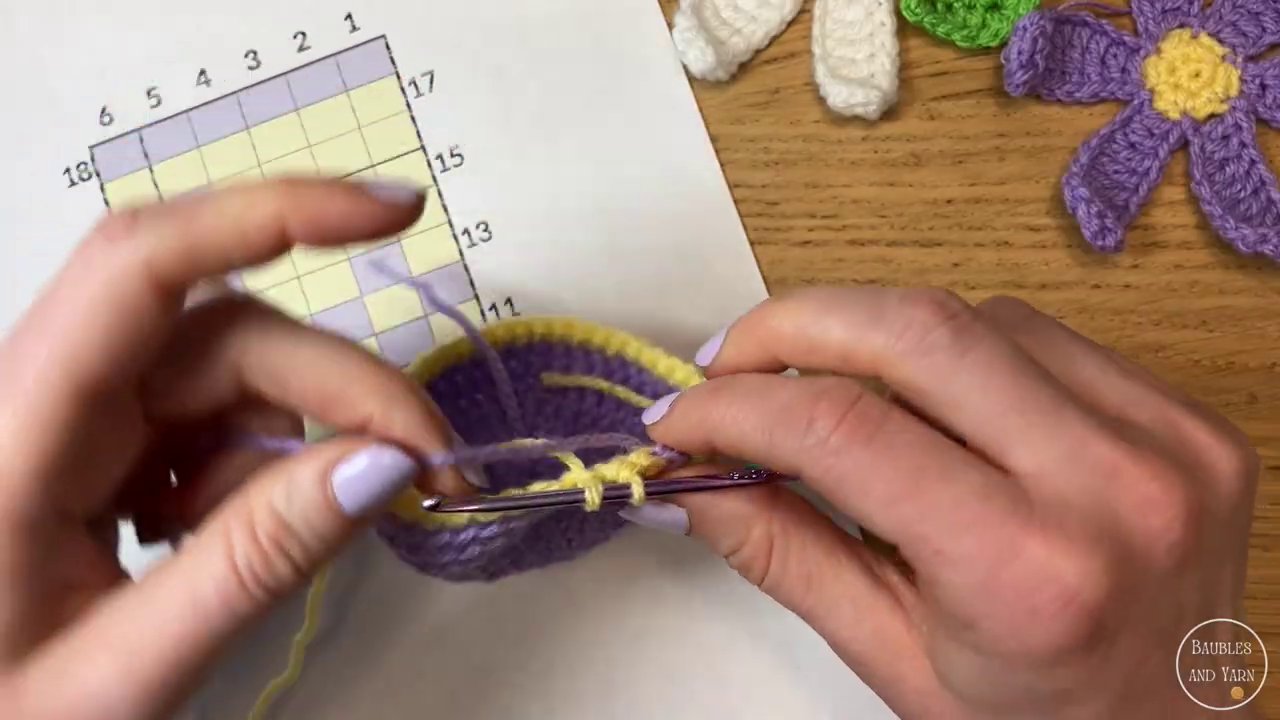
I have a full tutorial on carrying yarn if you want to see it in action. It’s one of those techniques that makes colorwork so much smoother once you get the hang of it.
Putting It All Together
Let’s walk through a more complex round so you can see how the chart guides every decision.
Round 12 shows: purple, yellow, purple, then three yellow. That’s six stitches total. So you start with a purple stitch, switch to yellow for the next, switch back to purple for the third, then do three yellow stitches.
On the fourth yellow stitch, since the pattern repeats, you’ll be starting the next block with purple again. That means you need to do a color change at the end of that fourth yellow stitch — even though you’re still in the same round. Every time the chart shows a new color, you switch.
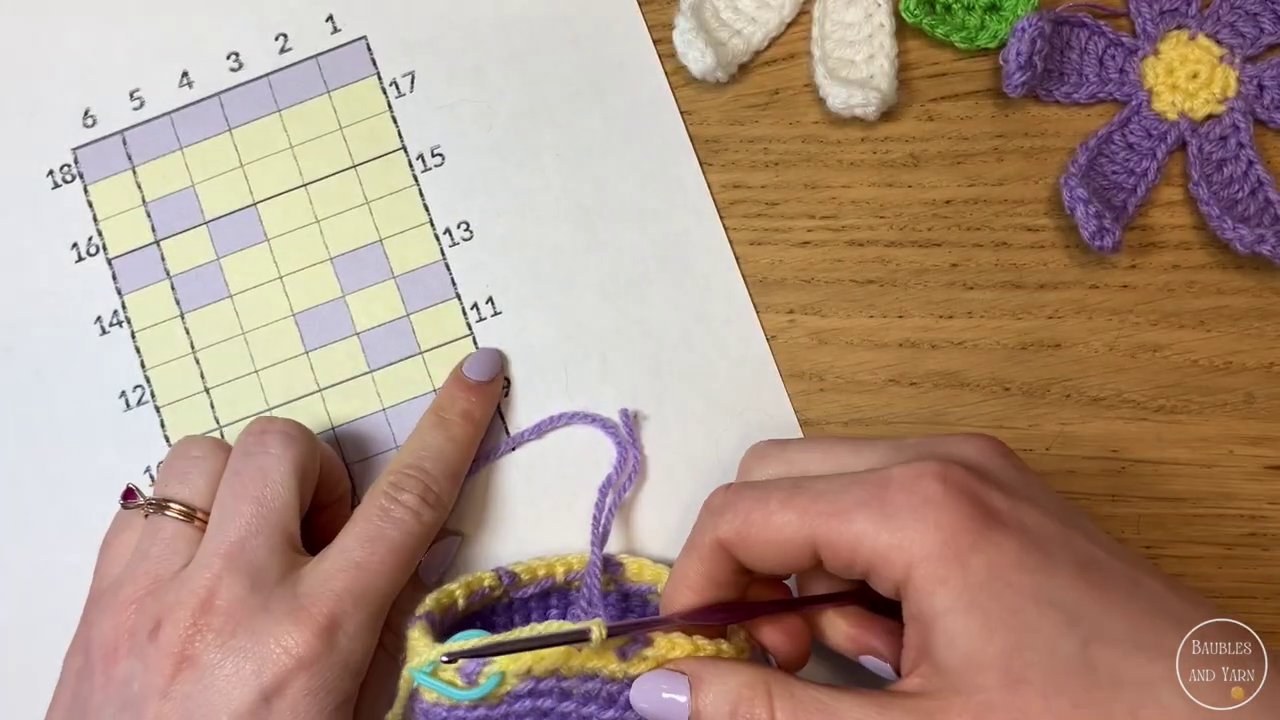
This is where people get tripped up. They think they can just work all the yellow stitches in a row and then switch. But the chart doesn’t work that way. Each square is its own stitch, and the color changes happen exactly where the squares change color. If the chart shows yellow, purple, yellow, that’s three separate color changes in three stitches.
It sounds fussy, but once you’re in the rhythm, it becomes automatic. Your hands learn the pattern.
A Few Things to Keep in Mind
Every square equals one stitch. That’s the golden rule.
Your chart might show a full project or just a repeat. If it’s a repeat, you’ll work that block of stitches over and over until you complete the round or row.
Do your color changes on the last yarn over of the stitch before the new color. This keeps the color transition sharp and prevents the wrong color from bleeding into the next stitch.
Figure out your float management early. Whether you carry, leave floats, or crochet over, pick a method and stick with it for consistency.
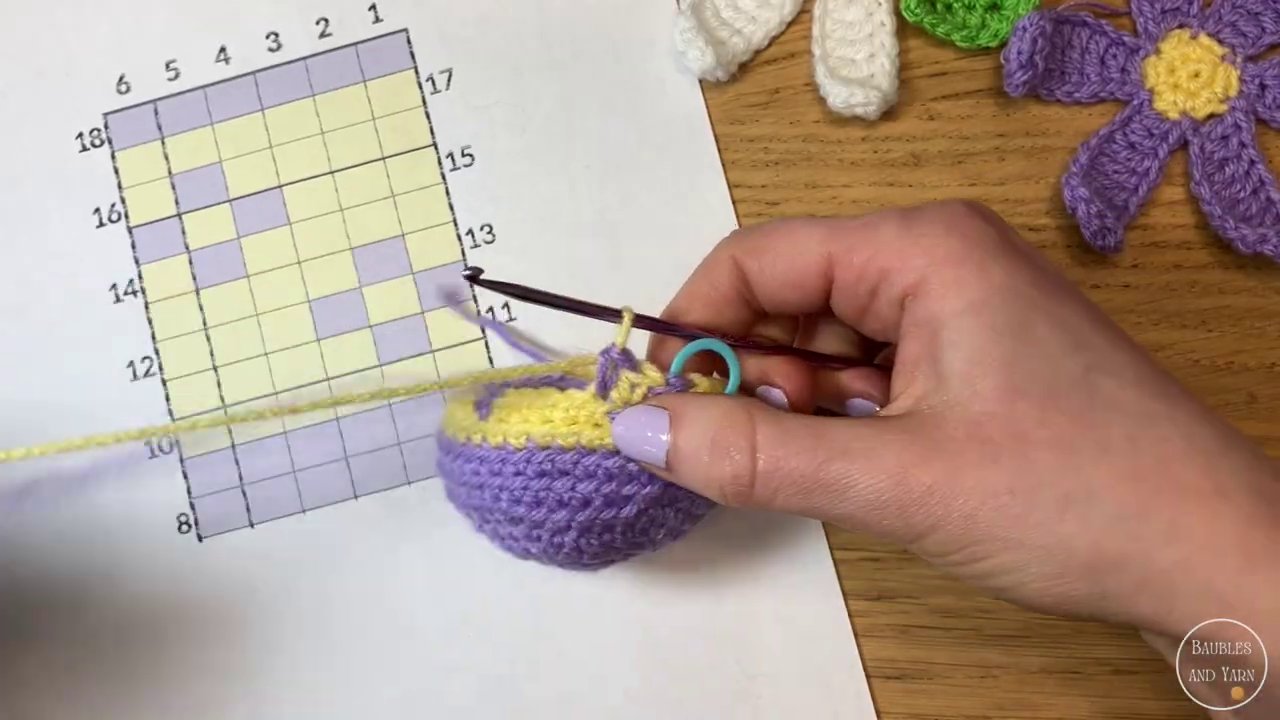
And if you’re working on something like this spring mug cozy I’m making, the chart is your best friend. It tells you exactly where every color goes, no guesswork involved.
Your Turn
Crochet charts aren’t as scary as they look. Once you understand that each square is one stitch and the numbers guide your rows, you can tackle just about any colorwork pattern. Start with a simple repeat, practice your color changes, and don’t be afraid to frog a few stitches if something looks off.
If you have questions, drop them in the comments. I’d love to hear what you’re working on — tapestry, colorwork, or whatever else you’ve got on your hook. And if you want to see the finished spring mug cozy, keep an eye out for the next project video.
Thanks for sticking with me. Happy crocheting.