Easy No-Sew Mini Crochet Ghost for Beginners
A no-sew crochet ghost is one of the fastest wins in beginner amigurumi: a small, cute Halloween ghost worked in one piece from the top down, with no separate parts to sew on afterwards. Experienced crocheters often finish a mini ghost in about 15 to 20 minutes, and a beginner should allow under an hour…
nathalie · · 5 phút đọc
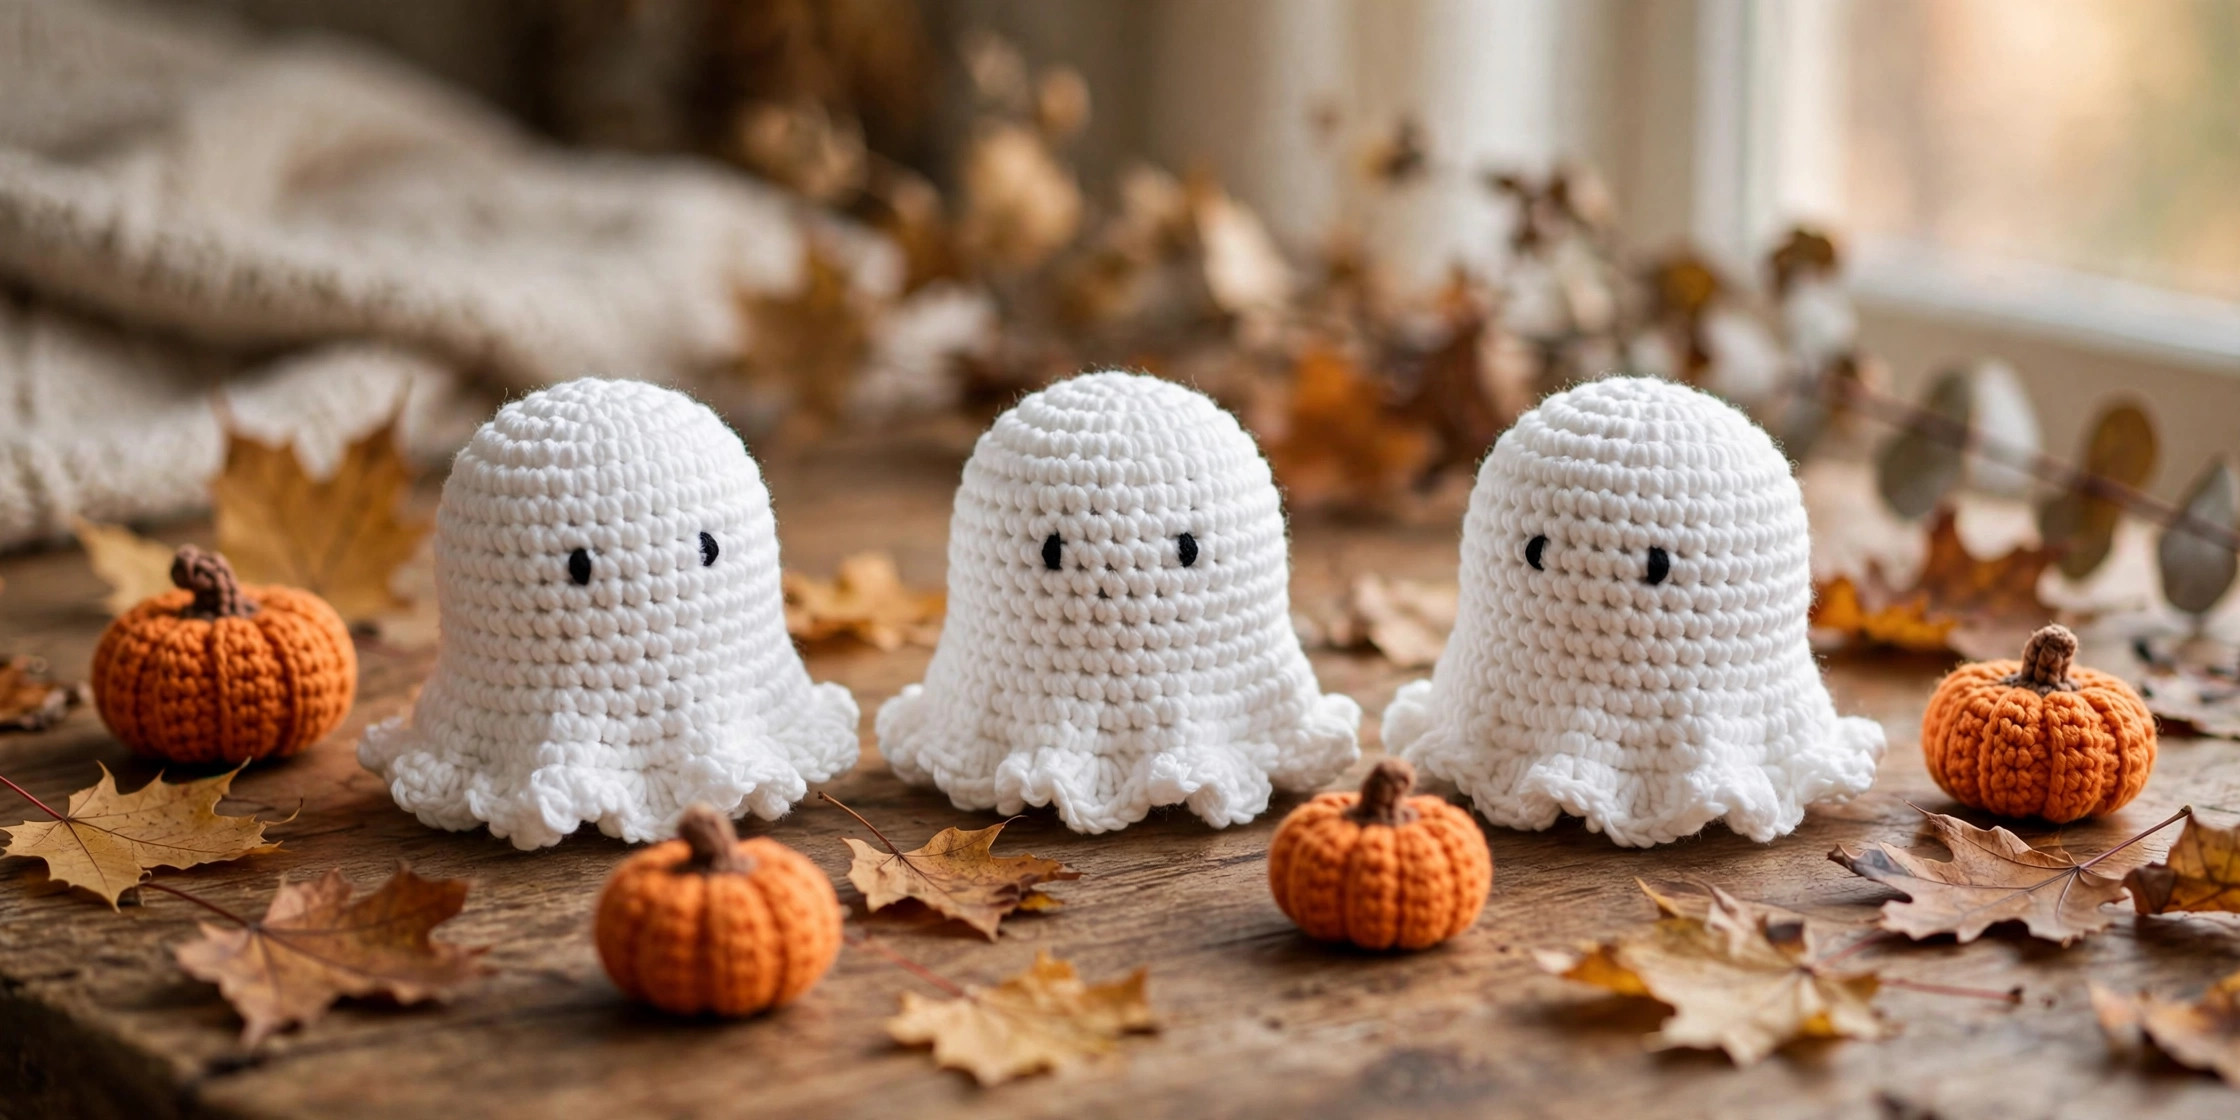
A no-sew crochet ghost is one of the fastest wins in beginner amigurumi: a small, cute Halloween ghost worked in one piece from the top down, with no separate parts to sew on afterwards. Experienced crocheters often finish a mini ghost in about 15 to 20 minutes, and a beginner should allow under an hour for a first one. All you need is white yarn, a hook, a little stuffing, and a way to make the face.
This is an original overview, not a copy of another maker’s tested pattern, so treat the steps below as a roadmap.
Why This No-Sew Crochet Ghost Works for Beginners
Traditional amigurumi can feel fiddly because each arm, ear, or tail is made separately and then sewn on. A no-sew ghost removes that whole stage. The head and body are a single shape, the bottom edge is finished with a wavy or ruffled hem, and the face is added at the end. That means fewer pieces to lose, fewer seams to neaten, and a finished decoration in a single sitting.
What You Need for a No-Sew Crochet Ghost
- White yarn: chunky or plush chenille yarn makes a soft, squishy ghost quickly, while worsted weight yarn makes a smaller, neater one
- A crochet hook to match your yarn, often a size smaller than the yarn label suggests, so the stitches stay dense and the stuffing does not show through
- A small amount of polyester fiberfill stuffing
- Safety eyes, or black yarn for an embroidered face
- A stitch marker, a yarn needle for weaving in ends, and scissors
- Optional extras: a keychain ring, a hanging loop, or a tiny bow
How the No-Sew Crochet Ghost Comes Together
Most no-sew ghost designs follow the same simple shape. You start at the top of the head with a magic ring, then work rounds of single crochet, increasing until the head reaches the width you want. Next come several straight rounds that form the body, with the face placed partway down. Finally, you work a decorative wavy edge at the bottom, add a little stuffing, and close the base.
In practice, the order looks like this:
- Make a magic ring and grow the rounded top with increase rounds
- Work straight rounds to build the body, marking the start of each round
- Place the eyes while you can still reach inside the ghost, and add a small mouth
- Work the wavy bottom edge, then stuff lightly and close the base
- Weave in the yarn tail and give the hem a gentle shake into shape
The wavy edge is what makes the ghost read as a ghost rather than a ball. If your edge looks too tight, try a slightly larger hook for that round only.
Beginner Tips That Keep Your Ghost Cute
- Use a stitch marker every round. Losing your place in continuous rounds is the most common beginner mistake.
- Choose a hook one size smaller than the yarn label recommends. Dense stitches hide the stuffing and give the ghost a clean, plush look.
- Stuff in small pieces, not one big handful, so the body fills evenly and keeps its shape.
- Place the eyes before you close the ghost, and check from the front that they sit level, because safety-eye washers are very hard to remove once clicked in.
- Keep the face simple. Two eyes and a tiny oval mouth are all a mini ghost needs.
For babies and children under three, skip plastic safety eyes and embroider the eyes with yarn instead. Safety eyes are secured with washers, but they are still small parts, and an embroidered face cannot come off at all.
Fun Ways to Use Your Mini Ghosts
Because each ghost is quick, you can make a whole set in an evening.
- String several ghosts together into a Halloween garland for a mantel, window, or party table
- Add a keychain ring to turn a single ghost into a bag charm
- Tie one onto a treat bag or candy jar as a handmade gift topper
- Make a set as non-candy party favours or classroom treats
- Pair your ghosts with crochet pumpkins for a complete fall display, starting with these 12 Crochet Pumpkin Patterns for Cozy Fall Decor

Ghosts also make sweet last-minute gifts. If you are planning a run of handmade presents, browse our 15 Easy Crochet Gift Ideas for Beginners for more quick projects that use up small amounts of yarn.
Frequently Asked Questions
How long does a no-sew crochet ghost take? Experienced makers often finish one in 15 to 20 minutes; beginners should allow up to an hour for the first one.
What yarn is best for a crochet ghost? Chunky or plush chenille yarn gives a soft, squishy ghost fast, while worsted weight yarn gives a smaller, more defined one. Either works if your stitches are dense enough to hide the stuffing.
Do I need safety eyes? No. Safety eyes give a classic look, but embroidered eyes work just as well and are safest for very young children.
Can I make a ghost garland from this project? Yes. Make several ghosts in the same yarn and hook size, then thread them onto a yarn chain with a few pom-poms between them.
Start with one ghost, enjoy the quick finish, and then make a whole haunted crew. Few beginner projects teach so much, take so little time, and look this cute on a shelf.
Đọc tiếp
Tips
Crochet Tension Too Tight: A Practical Gauge Check
Diagnose too-tight crochet with finished gauge, loop formation, yarn resistance, and controlled hook-size comparisons.
· 11 phút đọc
Hướng dẫn
How to Join Granny Squares for a Balanced Blanket
Compare sewn and crocheted granny-square joins, align corners and stitch counts, test finished dimensions, and assemble a blanket without pulling its seams tight.
· 11 phút đọc
Beginner
How to Make a Slip Knot for Crochet
Make an adjustable starting loop, identify the working yarn and tail, and move from the knot into your first counted chains.
· 12 phút đọc