
There’s something almost magical about pulling a loaf of bread out of your own oven. The crust crackles as it cools, the kitchen smells like a bakery, and you realize you made that from flour, water, and a little patience. If you’ve ever thought homemade bread was too complicated or time-consuming, this recipe might change your mind. It’s simple, forgiving, and produces a loaf that tastes like it took hours of effort — when really, the dough does most of the work for you.
Why This Recipe Works
Not all bread recipes are created equal. Some demand a starter you’ve been feeding for weeks. Others require a stand mixer, a proofing basket, and a razor blade for scoring. This one? It asks for basic ingredients, a bowl, and your hands. The magic comes from a long, slow rise that develops flavor and texture without you having to do much of anything.
The dough is soft and slightly sticky, which is exactly what you want. A wetter dough means a lighter crumb and a better crust. You don’t need to knead it into submission — just a few folds and you’re done. Let time do the heavy lifting.
Ingredients You’ll Need
You probably already have most of these in your pantry:
- 3 ½ cups all-purpose or bread flour
- 2 teaspoons salt
- 1 teaspoon active dry or instant yeast
- 1 ½ cups warm water (about 110°F)
That’s it. No eggs, no butter, no milk. The beauty of a simple bread recipe is that it lets the flour and fermentation shine. If you want to get fancy later, you can add herbs, cheese, or seeds. But start with the plain version — you’ll be surprised how good it is.

Mixing the Dough
In a large bowl, whisk together the flour, salt, and yeast. Add the warm water and stir with a wooden spoon or your hand until a shaggy dough forms. It will look rough and lumpy — that’s fine. Cover the bowl with plastic wrap or a damp towel and let it sit for 10 minutes.
After that short rest, fold the dough over itself a few times. Just reach in, grab one side, and pull it over the top. Turn the bowl and repeat. This builds structure without aggressive kneading. Cover the bowl again and let it rise at room temperature for at least 12 hours, or up to 18. Overnight works perfectly.
The Long Rise
This is where the bread gets its soul. During that long rest, the yeast slowly ferments the flour, creating bubbles and complex flavors. The dough will more than double in size and look bubbly on top. If you’ve never made bread this way before, you might worry it’s too wet or too sticky. Don’t. That sticky, bubbly texture is exactly what you want.
Shaping the Loaf
Turn the dough out onto a well-floured surface. It will be loose and sticky, so dust your hands with flour too. Gently stretch it into a rough rectangle, then fold the top edge toward the center, then the bottom edge over that. Fold the sides in, and flip the whole thing seam-side down. You should have a round or oval loaf shape.
Don’t overwork it. The goal is to create surface tension on the outside while keeping the air bubbles inside. Let the shaped dough rest on a piece of parchment paper for 30 minutes while you preheat your oven.
The Hot Pot Trick
Here’s the secret to a crackling crust: a covered pot. A Dutch oven works best. Place it in the oven while it preheats to 450°F. You want the pot screaming hot. When the dough has rested, carefully lift the parchment paper and lower the dough into the hot pot. Cover with the lid and bake for 30 minutes.

After 30 minutes, remove the lid and bake for another 15 to 20 minutes. The crust will turn deep golden brown, and the loaf will sound hollow when you tap the bottom. Let it cool on a wire rack for at least an hour before slicing. I know it’s tempting to cut into it right away, but the interior is still setting. Patience pays off here.
What to Do With Your Bread
This loaf is a blank canvas. Slather it with butter and flaky salt. Dip it in olive oil and balsamic. Make thick toast for avocado or jam. It’s also fantastic alongside soup or salad. If you’re feeling ambitious, use it for sandwiches the next day — the flavor only improves.

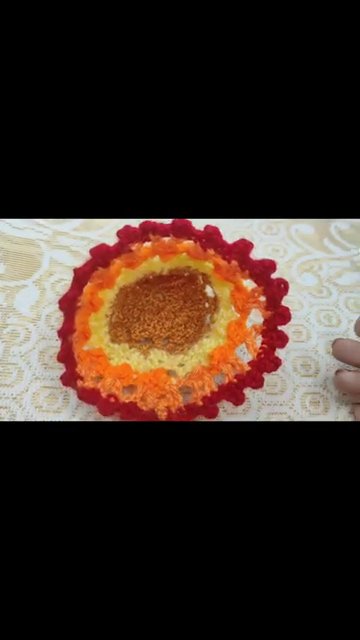
If you enjoy this kind of hands-on craft, you might also like making crochet dishcloths for your kitchen. Both projects reward patience and simple materials with something beautiful and useful.
Troubleshooting Common Issues
My dough didn’t rise much. Your yeast might be old, or your water was too hot. Yeast is a living thing — treat it gently. Water above 130°F will kill it. Also, make sure your kitchen isn’t too cold. A warm spot helps fermentation.
The crust is too hard. That’s actually a feature, not a bug, for many bread lovers. But if you prefer a softer crust, brush the hot loaf with butter as soon as it comes out of the oven. The steam softens the exterior.
The inside is gummy. You probably cut into it too soon. Let it cool completely. If it’s still gummy after cooling, the bread might need a few more minutes in the oven next time.

Variations to Try
Once you’ve mastered the basic loaf, experiment. Add a tablespoon of dried rosemary and a handful of grated Parmesan to the flour. Fold in chopped olives or sun-dried tomatoes during shaping. Swap half the white flour for whole wheat — you’ll need a little extra water, but the nutty flavor is worth it.
For a sweeter version, add two tablespoons of honey and a teaspoon of cinnamon. That variation makes incredible French toast.
If you’re into crafting small, cute projects, you might enjoy making a monster keychain as a gift. Both baking and crocheting share that satisfying rhythm of turning simple materials into something lasting.
Storing and Freezing
This bread stays fresh for about three days at room temperature wrapped in a cloth or paper bag. Don’t store it in plastic — the crust will turn soggy. If you can’t finish the loaf, slice the rest and freeze it. Toast slices straight from the freezer, and you’ll have fresh-tasting bread anytime.

Why You Should Try It
Homemade bread isn’t just about the food. It’s about slowing down for a minute. Mixing dough by hand, waiting for it to rise, watching it transform in the oven — that process is grounding. You don’t need fancy equipment or a bakery degree. Just flour, water, yeast, salt, and a little time.
This recipe works because it meets you where you are. It’s forgiving enough for a first-timer and satisfying enough for someone who’s made a hundred loaves. The crust will crackle, the crumb will be soft, and you’ll wonder why you didn’t start baking sooner.

So go ahead. Dust off that Dutch oven. Clear a spot on your counter. Mix up a shaggy dough tonight, and wake up to the smell of fresh bread tomorrow. You’ve got this.